Fresh Mind Tech

Computer,Handphone,Windows,Android,Linux,IOS,Blackberry

Experience Makes Linux Based Internet Cafe

Experience Makes Linux Based Internet Cafe


I have a cafe business which uses Linux OS. At first, I was hesitant to install Linux in the cafe for fear of users / consumers of my confusion in use. But because I was amazed by the view and the freedom to learn / modified (Open Source) as well as the free download so I remove that doubt. And it turns out my customers no objections to the application of this linux OS. I use a Linux OS user friendly as Linux Mint and Ubuntu to the users of the cafe here. Most of the client computer designed to be as easy as possible zoom can be used by consumers.

Initially I was confused by this OS but because I was determined to learn it so now I can build a Linux-based network to the Internet cafe. Up to this time I continue to monitor developments and continue to try to use Linux distro - distro - Excellent. I have a computer at home that I use to try out various Linux distributions. Most Linux I have tried comes from a family of Debian, but I also have tried Slackware and Fedora.

I am currently interested in the world of programming using Linux, because I see the structure built by linux system is very stable. However, I still need to learn a lot in the affairs of this one, the article I still have not found what programming language I want to learn and want to use for what nantinya.Apabila anyone have any experience on programming in linux please enlightenment.

Some Linux distributions are great for beginners so easy to understand are as follows:

- Zorin Os (Ubuntu)

- Mate Ubuntu (Ubuntu)

- Linux Mint

Some distros above is very easy to use, the installation process up to the compatibility of the hardware and software are quite complete. This makes beginners have no difficulty in using it. Besides the three user community distro it was very much so it will be very easy for users to ask all matters relating to these distros.

In choosing Linux for Internet cafes need to think about things - the following:

- Easy to use (user-friendly)

- Is in the process of sharing files

- Ease of installation non-Linux programs on Linux

- Stability of distributions os

- The compatibility of hardware and software as well as editing

- To suitability os distro with a spec computers owned in order to produce the performance of a computer is comfortable to use by the user


Thus the whole thing that I want to pour from my pikirian into this paper. If anyone would like to share or question or anything related to linux, I am open to it
Release OS yet, Android N Immediately Used Samsung

Release OS yet, Android N Immediately Used Samsung


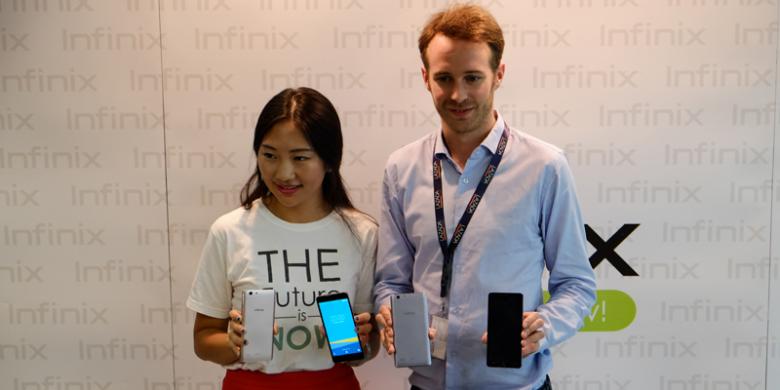
Chinese mobile phone vendors Infinix launching several variants Hot 3 series phones in Indonesia.Both phones are trying to compete in the Indonesian market by offering a sale price-downs. Two variants are Infinix Hot 3 X553 and X554 series."This is a twin phone. X553 series as her brother have to see who is more complicated, such as diamond-textured back cover, "said Country Manager Infinix Indonesia Marcia Infinix Hot Sun in the launch of 3 in Jakarta."While the X554, his brother, (specs) is simpler and offers a large selection of colors," said Marcia.Infinix Hot 3 X553 series which can be regarded as the highest specifications. 5.5 inch sized phone is equipped with Qualcomm MSM8929 Snapdragon 415 chipset, 2 GB RAM and 16 GB ROM.Sharp 8 megapixel main camera, while the front camera is 5 megapixel with LED flash feature enhancements soft. Infinix Hot 3 X553 series have supported the 4G LTE connection.Infinix Hot 3 X554 series belongs to a slightly lower specification, despite its largely similar. For example, the screen size of 5.5 inch, 8 megapixel camera is important, 3,000 mAh battery, 2 GB RAM and 16 GB ROM.Yoga Hastyadi Widiartanto / KOMPAS.com Android Infinix Hot 3The difference lies in the brain aliasing processor, Internet connectivity, as well as the resolution front camera. Infinix Hot 3 X554 series uses MediaTek 6580 chipset and 2-megapixel front camera.The difference that most feel is the internet connectivity features. X554 series still use 3G only, so that the user does not begin able to enjoy fast internet that is now being promoted by telecommunications operators.Both phones are equally sold on the online trading site with the official Lazada affordable. Infinix Hot 3 X553 is able to be redeemed at a price of USD 1,599 million, while Hot 3 X554 cheaper for USD 1.3 million.Source: http://tekno.kompas.comThank you for reading news on the topic Gadget. Share news about Android Infinix Hot 3 for sale in Indonesia, the price of Rp 1 Million if you find it useful.
Dual Boot Ubuntu and Windows 7 | Fresh Mind Tech

Dual Boot Ubuntu and Windows 7 | Fresh Mind Tech


  • Windows 7 and Ubuntu, despite their opposing missions, can get along like best pals on a single computer. Here's how to set up a dual boot system that lets you enjoy the best of both worlds in perfect harmony.
    By default, Windows 7 takes over your boot-up process and wants to be your only OS, and Linux treats Windows like a weekend hobby you keep in a shed somewhere on your hard drive. But I've been dual-booting Ubuntu and some version of Windows 7 for nearly a year, and I've learned a lot about inconveniences, annoyances, and file-sharing necessities, and now I'll walk you through how to set up your systems to achieve a peaceful union of your dual-boot OSes. (Both with Windows 7 already installed, and with a clean system ready for a new dual-OS existence.)
    Follow through this guide, and I'll explain how to rebuild a system from the ground up with Windows 7 and Ubuntu, with either a backed-up and cleaned-out hard drive (recommended) or Windows 7 already installed. When we're done, you can work and play in either operating system, quickly and conveniently access your documents, music, pictures, and other files without worry or inconvenience, and boot into either system without having to worry about whether Windows is going to get mad at you. Plus, when Ubuntu 10.04 or Windows 8 come along, you'll find it much easier to install either one without having to start over entirely from scratch.

    What you'll need

    • Windows 7 installation disc: For clean installations, either a full installation copy or an upgrade disc is needed. If you own an upgrade disc but want to start from scratch, there's a way to do a clean install with an upgrade disc, though that's a rather gray-area route. Then again, there's probably not a person on this earth that doesn't have a licensed copy of XP or Vista somewhere in their past.
    • Ubuntu 9.10 installation image: You can grab an ISO at Ubuntu.com, or hit "Alternative download options" to reveal a (usually very fast) BitTorrent link. You'll want to get the ubuntu-9.10-desktop-i386.iso download for 32-bit systems, or ubuntu-9.10-desktop-amd64.iso.torrent for 64-bit on AMD or Intel systems (despite the name).
  • Blank CD or empty USB drive: You'll need one of these for burning the Ubuntu ISO, or loading it for USB boot. If you're going the thumb drive route, grab UNetBootin for Windows or Linux, plug in your USB drive, and load it with the downloaded ISO image.
  • All your data backed up: Even if you're pulling this off with Windows 7 already installed and your media and documents present, you'll want to have a fallback in case things go awry. Which they shouldn't, but, naturally, you never know.
  • Free time: I'd reckon it takes about 2 hours to pull off two OS installs on a clean system; more if you've got a lot of data to move around.

Setting up your hard drive

If you've got nothing installed on your system, or you've got your data backed up and you're ready to start from scratch, you're in a great position—skip down to the "Partition your system" section. If you've got Windows already installed, you can still make a spot for Ubuntu, though.
(Only) If Windows is already installed: You're going to "shrink" the partition that Windows 7 installed itself on. Before we do that, clean out any really unnecessary applications and data from your system (we like Revo Uninstaller for doing this). Also, open up "Computer" and take note of how much space remains on your main hard drive, presumably labeled "C:". Head to the Start menu, type "disk management" into the search box, and hit Enter.
Windows 7 probably put two partitions on your hard drive: one, about 100 MB in size, holding system restoration data. We don't want to touch it. Right-click on the bigger partition to the right, and choose Shrink Partition.

Dual-Boot Windows 7 and Ubuntu in Perfect HarmonyAfter a little bit of hard drive activity and a "Please wait" window, you'll get back the size you can shrink your Windows partition by.
Dual-Boot Windows 7 and Ubuntu in Perfect HarmonyIf the space Windows offers doesn't jibe with what your Computer view told you was "remaining," you might need to hit Cancel, then head back and defragment your hard drive, and take some of the steps laid out by the How-To Geek. Run the Disk Management tool again and try a Shrink Volume operation again, and free up as much space as you can.
Partition your system: You're aiming to set up a system with three partitions, or sections, to its hard drive: One lean partition for the Windows operating system and applications running from it, another just-big-enough partition for Ubuntu and its own applications, and then a much larger data partition that houses all the data you'll want access to from either one. Documents, music, pictures, application profiles—it all goes in another section I'll call "Storage" for this tutorial.
How do you get there? We're going to use GParted, the Linux-based uber-tool for all things hard drive. You could grab the Live CD if you felt like it, but since you've already downloaded an Ubuntu installer, you can simply boot a "live," no-risk session of Ubuntu from your CD or USB stick and run GParted from there. Once you're inside Ubuntu, head to the System menu in the upper left when you get to a desktop, then choose the Administration menu and GParted under it.

Dual-Boot Windows 7 and Ubuntu in Perfect HarmonyYou'll see your system's hard drive and its partitions laid out. You're going to create partitions for Linux and your storage space, but not Windows—we'll let the Windows installation carve out its own recovery partition and operating space. On my own system, I give Windows 15 GB of unallocated space, and Ubuntu another 15 GB of space right after it, with whatever's left kept as storage space. Then again, I've only got a 100 GB hard drive and don't run huge games or applications, so you can probably give your two operating systems a bit more space to grow.
Click on the unallocated space and hit the "New" button at the far left. In the "Free space preceding" section, click and hold the up button, or enter a number of megabytes, to leave space for Windows at the front. When you've got the "space preceding" set, set the actual size of the Ubuntu partition in the "New Size" section, and leave "Free space following" alone. Choose "unformatted" under file system—we'll let Ubuntu do the format itself and hit "Add." Back at the main GParted window, click on the space to the right of your two OS spaces, hit "New" again, and set the file system as "ntfs." Give it a label like "Storage," hit "Add," and at the main GParted window, hit the checkmark button to apply your changes. Once it's done, exit out of GParted and shut down the system from the pull-down menu in the upper-right corner.
If Windows is already installed: If you've shrunk down its partition for free space and booted into a live Ubuntu or GParted, click on the "Unallocated" piece next to the two "ntfs" partitions that represent your Windows 7 installation and system recovery tools. Create a 15(-ish) GB unformatted partition, and give it a label like Ubuntu. If you've got a good deal of space left, format it as "ntfs" and label it something like "Storage." If you can just barely fit the Ubuntu partition, you can just keep your media files in the Windows partition—until you can remedy this with a full wipe-and-install down the line.
Experienced Linux geeks might be wondering where the swap space is going—but don't worry, we'll create one, just not in its own partition.

Installing and configuring Windows

Grab your Windows 7 installation disc—either a full copy or modified upgrade disc, and insert it into your DVD drive. If your system isn't set up to boot from CD or DVD drive, look for the button to press at start-up for "Boot options" or something similar, or hit up your system maker's help guides to learn how to change your boot order in the BIOS settings.
Follow through the Windows 7 installation, being sure to choose "Custom" for the installation method and to point it at that unallocated space we created at the beginning of your hard disk, not the NTFS-formatted media/storage space we made earlier:

Dual-Boot Windows 7 and Ubuntu in Perfect HarmonyWork your way through the Windows 7 installation, all the way until you reach the Windows desktop. Feel free to set up whatever programs or apps you want, but what we really want to do is set up your Storage partition to house your pictures, music, video, and other files, and make your Libraries point to them.
Hit the Start menu, click Computer, and double-click on the hard drive named "Storage" (assuming you named it that earlier). In there, right-click and create new folders (or hit Ctrl+Shift+N) for the files you'll be using with both systems. I usually create folders labeled Documents, Music, Pictures, and Videos—I could also see folders for saved games and data files from big software packages. Copy your media files into these folders now, if you'd like, but we've got a bit more tweaking to pull off.
In the left-hand sidebar, you'll see your "Libraries" for documents, music, pictures, and video. At the moment, they point to your Public shared folders and the My Pictures-type folders on your main Windows drive. Click once on any of the Libraries, and at the top of the main panel, you'll see text stating that this library "Includes: 2 locations ...". Click the blue text on "2 locations," then click on each of the folders below and hit "Remove" on the right-hand side. Now hit "Add" and select the corresponding folder on your Storage drive. Do the same for all your music, pictures, videos, and other media folders.
Dual-Boot Windows 7 and Ubuntu in Perfect HarmonyWant to add another library for quick access? Right-click somewhere on the desktop, choose New->Library, and follow the steps.
That's about it for Windows. Now get your Ubuntu CD or USB stick ready and insert it in your system. Ignore whatever auto-play prompts appear, and restart your system.

Installing and configuring Ubuntu

Restart your computer, this time booting from your Ubuntu Live CD or USB boot drive. When your system boots up, choose your language, select "Try Ubuntu without any changes to your computer," and you'll boot into a "live" desktop, run entirely off the CD or USB stick. Once you're booted up, try connecting to the internet from the network icon in the upper-right—it helps during the installation process, ensures your network is working, and gives you something to do (Firefox) while the system installs.
Click the "Install" link on the desktop, and fill out the necessary language/location/keyboard info (most U.S. users can skip through the first 3 screens). When you hit the "Prepare disk space" section, select the "Specify partitions manually" option, then hit Forward. Select the free space that's after your first two Windows partitions with ntfs formats, then hit the "Add" button at bottom. Your partition should already be sized correctly, and the only thing to change is set "/" as a mount point. Here's what your screen should look like:
Dual-Boot Windows 7 and Ubuntu in Perfect HarmonyClick OK, then finish through with the Ubuntu installation. If it catches your Windows 7 installation, it might ask if you want to import settings from inside it—you can, if you'd like, but I usually skip this. Wait for the installation to finish, remove the CD or thumb drive, and reboot your system.
When you start up again, you'll see a list of OS options. The only ones you need concern yourself with are Windows 7 and the top-most Ubuntu line. You can prettify and fix up this screen,change its settings, and modify its order later on. For now, let's head into Ubuntu.


We're going to make the same kind of folder access change we did in Windows. Click up on the "Places" menu, choose "Home Folder," and check out the left-hand sidebar. It's full of links to Documents, Pictures, and the like, but they all point to locations inside your home folder, on the Linux drive that Windows can't read. Click once on any of those folders, then right-click and hit Remove.

Dual-Boot Windows 7 and Ubuntu in Perfect HarmonyYou should see your "Storage" partition in the left-hand sidebar, but without that name—more like "100GB filesystem." Double-click it, type in the administrator password you gave when installing, and you'll see your Documents, Music, etc. Click and drag those folders into the space where the other folders were, and now you'll have access to them from the "Places" menu, as well as any file explorer window you have open.
Ubuntu won't "mount," or make available, your Windows 7 and Storage drives on boot-up, however, and we at least want constant access to the Storage drive. To fix that, head to Software Sources in the System->Administration menu. From there go to Applications, then the Ubuntu Software Center at the bottom. Under the "Ubuntu Software" and "Updates" sections, add a check to the un-checked sources, like Restricted, Multiverse, Proposed, and Backports. Hit "Close," and agree to Reload your software sources.

Finally! Head to the Applications menu and pick the Ubuntu Software Center. In there, search for "ntfs-config," and double-click on the NTFS Configuration Tool that's the first result. Install it, then close the Software Center. If you've got the "Storage" or Windows 7 partitions mounted, head to any location in Places and then click the eject icon next to those drives in the left-hand sidebar. Now head to the System->Administration menu and pick the NTFS Configuration Tool.
You'll see a few partitions listed, likely as /dev/sda1/dev/sda2, and the like. If you only want your storage drive, it should be listed as /dev/sda3 or something similar—just not the first or second options. Check the box for "Add," click in the "Mount point" column to give it a name (Storage, perhaps?), and hit "Apply." Check both boxes on the next window to allow read/write access, and hit OK, and you're done. Now the drive with all your stuff is accessible to Windows and Linux at all times.

Adding swap to Ubuntu

"Swap" memory is a section of the hard drive that your system's memory spills over into when it gets full and busy. Until recently, I'd been creating a whole separate partition for it. Recently, though, I've found that swap isn't always necessary on systems with a large amount of memory, and that swap can simply be a file tucked away on your hard drive somewhere.
Follow the Ubuntu help wiki's instructions for adding more swap, but consider changing the location they suggest putting the swap file—/mnt/swap/ for the place your Storage is held—/media/Storage, in my case.
Galaxy S6 and S6 Edge Android 6.0 goto Start Marshmallow

Galaxy S6 and S6 Edge Android 6.0 goto Start Marshmallow


Smartphone Samsung introduced at Mobile World Congress (MWC) in 2015, the Galaxy S6 and Galaxy S6 Edge, began gets Android 6.0 Marshmallow. This was confirmed by an announcement on the official website of Samsung Newsroom.

Disclosed, both will begin to taste the latest Android operating system per February 15, 2016. As for the other Galaxy series devices will also be following this update.Samsung, still according to that information, will make a separate announcement regarding Android updates schedule details for each market in various countries, according to the market situation and the needs of operators in the country.


With the Android 6.0 update Marshmallow, Samsung offers a screen edge and the edge of the screen features a new, more improved. Among them is the unique user interface of the curved edge of the screen, a faster and more convenient than ever.


For specifications, Samsung Galaxy S6 comes with a choice of color White Pearl, Black Sapphire, Gold Platinum and Blue Topaz, while the Galaxy S6 Edge sheathed Green Emerald. Both are equipped with AMOLED screen Quad HD (2560 x 1440) measuring 5.1 inches, supported by similar octa-core processor with 2.1 GHz Quad blend + Quad 1.5 GHz combined operating system (OS) Android 5.0 Lollipop.


Then in the camera sector, smartphones already support LTE Cat.6 (300 / 50Mbps) for 4G LTE-Advanced has a 16-megapixel rear camera (MP) and 5MP front camera. With 3GB of RAM, Samsung provides internal memory options of 32, 64 and 128GB.The difference between the Galaxy S6 and Galaxy S6 Edge Galaxy S6 Edge is equipped with an additional screen on the side. Galaxy S6 weighs 132 grams, while the Galaxy S6 Edge 138 grams.
It Pricing and Specs of Samsung Galaxy J5 2016 Android Phone Perfect Fit Create Selfie

It Pricing and Specs of Samsung Galaxy J5 2016 Android Phone Perfect Fit Create Selfie


Smartphone previously only this rumor finally reveals itself. Samsung Galaxy J5 situr TENAA appeared in China which is a sign that the release of increasingly close.This phone is still carrying a design similar to the Galaxy series J7 amterial 2016. Using plastic material on the casing and metal on the frame. Then on the back of her look is also equipped with an infrared module resembles like the Galaxy J7. And as reported by GSM Arena reinforces the notion that technology brings laser autofocus (03/03).

Also Consider: Price and Specifications Samsung Galaxy J2 


Camera
For this aspect of the superior features, reinforced with a front camera with a resolution of 5 megapixel camera complete with LED flash for photos selfies and video calls. Then Samsung Galaxy J5 2016 as the South Korean manufacturer is complete with a main camera with a resolution of 13 megapixels autofocus supported laser-aperture f / 1.9 complete with the presence of LED flash.

ScreenThis smartphone brings a touch screen measuring 5.2 inches with HD resolution of 1280 × 720 pixels Super AMOLED panel technology with a capacity density of 294 pixels per inch. The phone is also embedded with the operating system Andorid 5.1.1 Lollipop with Samsung's unique TouchWiz UI interface.

featuresSmartphone Samsung Galaxy J5 2016 is equipped with an internal memory capacity of 16GB are supported microSD slot for external memory expansion. Samsung has also equipped Galaxy smartphone J5 2016 to support full connectivity, call it support 4G LTE, 3G HSDPA, WiFi, Bluetooth, and dual SIM. Unfortunately, not yet known how this smartphone battery capacity.

TechnologyThe performance offered by the Samsung Galaxy J5 2016 can be said to be equivalent to the first generation Galaxy J5 with the support of the chipset Qualcomm Snapdragon 410 that carries a quad-core processor ARM Cortex-A53 64-bit with a speed of 1.2 GHz, supported by 2GB of RAM memory and reinforced by the Adreno 306 graphics processor from.
Android Smartphone goto list Marshmallow

Android Smartphone goto list Marshmallow


Marshmallow Android 6.0 update could be felt five months ago. However, only 1.2 percent of Android devices in the world that have received this update.Unless Google Nexus devices, companies like Samsung, HTC, LG, and Sony is still trying hard to test firmware that can be adapted to a variety of devices.Quoted from page International Business Times, Saturday (02/27/2016), this is the Android 6.0 update status Marshmallow on Android devices in the world.1. SamsungThe latest news regarding the Android OS updates Marshmallow is for the Samsung Galaxy S6 Edge + that can be performed in his home country, South Korea. Now, the Galaxy S6, S6 Edge Galaxy and Galaxy Note 5 has been getting updates Android OS marshmallow in the country.A few days earlier, the update Marshmallow has been felt by users of the Galaxy S6 and S6 Edge in the UK through Vodafone network.Meanwhile, T-Mobile announced throughout the Galaxy S6 in the rest of Europe will be getting an update to OS Marshmallow in the near future. Likewise, the United States, which reportedly will follow after South Korea and Europe.Furthermore, users of the Samsung Galaxy Note in Hungary have received this update for their devices. Many people hope that this OS update would reach to the US and the UK in March or April.Meanwhile, the latest mobile phone Samsung Galaxy S7 and S7 Edge has run OS Marshmallow and will be available in the market around March.2.GoogleGoogle phone Nexus and Nexus 6P X5 has been executed with Marshmallow. Apart from both of the above devices, Nexus 5, Nexus 6 and Nexus 7, which was launched in 2013 as well as an Android phone, is now getting Android 6.0 OS update Marshmallow.Additionally, other Google-owned devices, Pixel C Tablet, Nexus 9 and Nexus Player also has obtained Marshmallow Android OS update.3. HTCHTC flagship phone launched in 2015, HTC One M9, as well as the middle class phone A9 HTC One Android 6.1 update has gained Marshmallow worldwide.HTC devices, such as the HTC One M8, HTC One M9 +, HTC One E9, HTC ME, HTC One E8, HTC M8 EYE, HTC Butterfly 3, HTC Desire 826, HTC Desire 820 and HTC Desire 816 is still not getting an update.4. SonyTurkey was the first country in the world that users of its Xperia Z can get Android update Marshmallow. The firmware is expected to be used to update the OS Xperia and Xperia Z5 Z5 Compact Premium for Android Marshmallow in the foreseeable future.While other Sony devices such as the Xperia Z3 +, Xperia Z3, Xperia Z3 Compact, Xperia Z4 Tablet, Xperia Tablet Z3 Compact, and Xperia Z1 reportedly yet to receive OS updates Marshmallow.5. LGMarshmallow Android OS update for the LG G4 and G3 have been carried by T-Mobile and AT & T. Meanwhile, LG's new device which was recently launched at the Mobile World Congress has the default OS Marshmallow that AnTuTu Benchmark test results have surpassed even his Samsung Galaxy S7.
Presence Blackberry Classic

Presence Blackberry Classic


Yet officially introduced, the BlackBerry is already open session booking (pre-order) for the new smartphone, the BlackBerry Classic.

BlackBerry Classic (or BlackBerry Q20) according to watchlist KompasTekno already be ordered in certain regions starting today, Friday (11/14/2014). Shop BlackBerry Web page displays information already pre-order the BlackBerry Classic.


According Shop BlackBerry, BlackBerry Classic can be ordered for consumers in the United States (US). The page also displays the official price of BlackBerry Classic is priced at 449 US dollars (approximately USD 5.5 million).


After a pre-order session was held, BlackBerry Classic will be introduced on 17 December 2014. BlackBerry is rumored to be making a special event to launch the Classic.BlackBerry Classic is a new smartphone output a Canadian company that has a distinctive shape and appearance of the BlackBerry device, the form candybar with a physical QWERTY keyboard below the screen.


However, for the Classic, BlackBerry made a number of improvements in its hardware specs, in order to follow the latest trends.


Offal hardware Classic include a 3.46 inch screen r
esolution of 720 x 720 pixels, 2 GB RAM, CPU Dual Core 1.5 GHz, 16 GB of internal storage, and equally important is the ability to install Android applications in addition to the BlackBerry application.

BlackBerry Classic will run BlackBerry OS 10.3 and are only available separately GSM version only.Party BlackBerry Indonesia could not be reached for confirmation on when users in Indonesia can make a reservation for BlackBerry devices Classic.
Back To Top